It all started when my wife signed me up to talk with the kids at my town’s local 4-H group. The 4-H group is a youth organization that focuses around nature and the local community. Our group in town works with farm animals, agriculture, and just other fun stuff that exposes kids to new experiences.
I wanted to create a lab and a small talk, but I had a very small budget. I decided that I would just do demonstrations of various projects I’ve already done and have it more focused on computer programming. But something kept telling me to do a lab and focus on a project that 4-H could actually use. Since 4-H does agriculture projects, building a soil moisture sensor would be something that would work with future projects they might have.
| Editor’s note: This post originally appeared on Will’s personal site and is shared here with his permission. |
Planning the 4-H lab
First, I started with a prototype of the project using an existing Particle Photon and some parts I had. Once the prototype was built, finding enough parts of the entire group was pretty tricky, but most were pretty cheap and on eBay or Amazon.
After communicating with the 4-H group leader, we decided that there was going to be around 30 or so kids. Obviously 30 sensors gets to be pretty expensive, but with some budgeting we could make it work with 15 sensors and have the kids pair up into groups of two for the lab.
Lab material list
- 15x Particle Photons
- 3x Jumper wires sets
- 15x Soil sensors
- 15x Breadboards
- 20x Micro USB cords
- USB hub with 13 ports
I also had another USB hub that I previously purchased that had 5 more connections so I could have all the soil sensors plugged in at once.
The most expensive part was the Particle Photon at $19.99 a piece. So, I reached out via twitter to @Particle and asked if they would maybe want to help out with the lab.
To my surprise they were more than happy to help. (Thx you Joe!). Particle sent me all the Photons and even maker kits for the lab for free. They are AMAZING people.
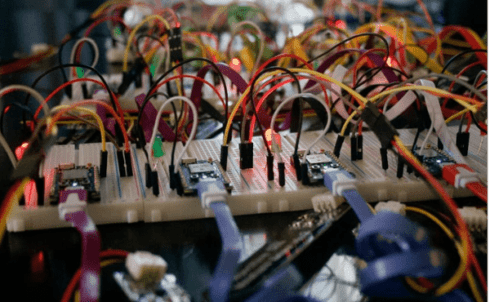
Building & Testing
Before the lab, everything needed to be tested to make sure it worked. This was also a good time to make sure the documentation and my slides were all correct. My kids also helped me and made sure it wasn’t confusing to understand.
Step 1. Adding the Photons to breadboards

I found that making diagrams for each step is also important documentation. There is a free software called Fritzing which lets you make diagrams and pictures. Below you’ll see an example of a Fritzing diagram.

Step 2. Wiring up the Photons


Step 3. Adding soil sensors


Step 4. Testing

The moisture data is read from the sensor attached to pin A0. The moisture value from the sensor gets read every second and pushed to the Particle Device Cloud using via the soilSensor variable. You can monitor the sensor remotely by using the Particle Cloud API and querying the soilSensor variable. This allows you to integrate this information into other applications.